VSCode Tutorial: Working with WATGPU
In this tutorial, we'll walk you through the process of setting up and using Visual Studio Code (VSCode) to work with WATGPU. This guide will cover connecting to the login gateway and accessing specific clusters (e.g., watgpu108, watgpu208, ...) after allocating resources.
Note that this method of connecting to WATGPU should be used for debugging and understanding your code via testing and notebooks. If you wish to run long experiments, please use the SBATCH command.
Prerequisites
Before you begin, make sure you have the following prerequisites installed:
Quick steps to install the Remote - SSH extension:
- Open Visual Studio Code
- Click on the Extensions icon in the Activity Bar on the side of the window.
- Search for "Remote - SSH" in the Extensions view search box.
- Install the "Remote - SSH" extension.
Step 1: Configuring VSCode
Once the extension is installed, follow these steps to connect to the login gateway (replace your_username with your actual username):
-
Press
Ctrl + Shift + P(Windows/Linux) orCmd + Shift + P(Mac) to open the command palette. -
Type "Remote-SSH: Open SSH Configuration File ...", select it and select the desired file (recommended file:
~/.ssh/config). -
Insert the following part and replace
<username>and<path/to/private/key>with your username and the path to your private key registered in WatGPU:#WATGPU Host DoNotConnect_watGPU User <username> IdentityFile <path/to/private/key> HostName watgpu.cs.uwaterloo.ca Host watGPU108 User <username> IdentityFile <path/to/private/key> HostName watgpu108 ProxyJump DoNotConnect_watGPU Host watGPU208 User <username> IdentityFile <path/to/private/key> HostName watgpu208 ProxyJump DoNotConnect_watGPU Host watGPU308 User <username> IdentityFile <path/to/private/key> HostName watgpu308 ProxyJump DoNotConnect_watGPU -
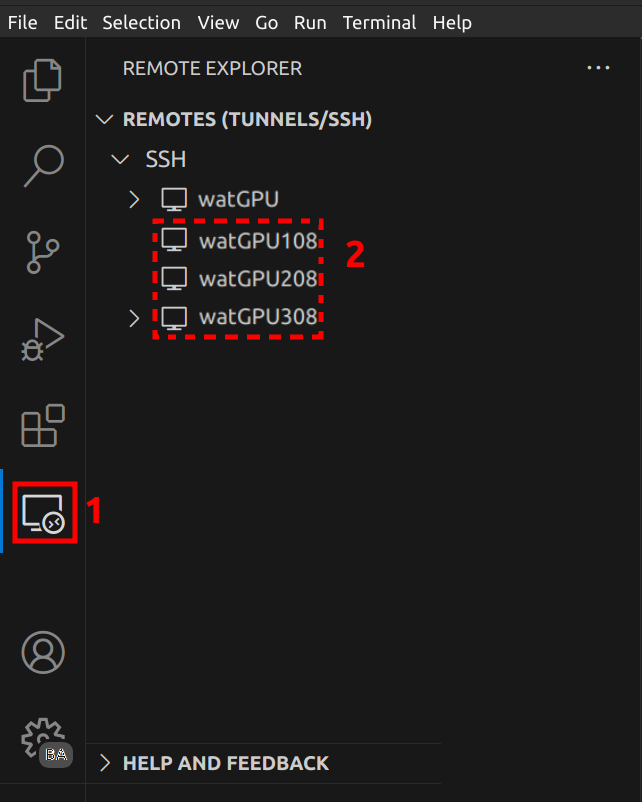
Save and refresh the Remote - SSH extension menu.
Step 2: Allocate Resources and Connect to Cluster
After successfully connecting via ssh to watgpu.cs.uwaterloo.ca, you'll need to allocate resources using salloc and then connect to a specific cluster:
-
Follow the Interactive mode part of the documentation to obtain resource allocation.
-
Once resources are allocated, connect to the appropriate cluster in VSCode:
That's it! You are now set up to work with WatGPU using Visual Studio Code.